MFA Step 3: Sign In After Enabling MFA
Sign Into Dallas College Account After Enabling MFA
After enabling MFA, setup will be required the first time you sign into your Dallas College Office 365 account on a computer. Please have your device with the Microsoft Authenticator App to hand to complete these steps. You can also start these remaining steps by visiting myaccount.microsoft.com and logging in with your Dallas College ID.
Note: For best results, Steps 1-5 should be completed on a computer or tablet. Steps 6-10 will be completed on your mobile device. Steps 11-12 will be finished on your computer or tablet.
Step 1:
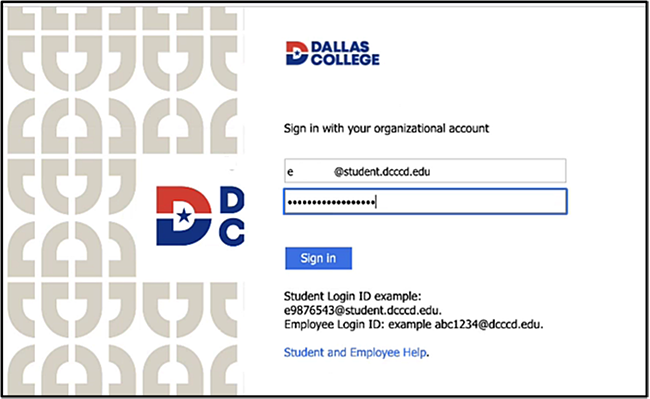
Start by signing into Dallas college using the e7@student.dcccd.edu and password.
Step 2:
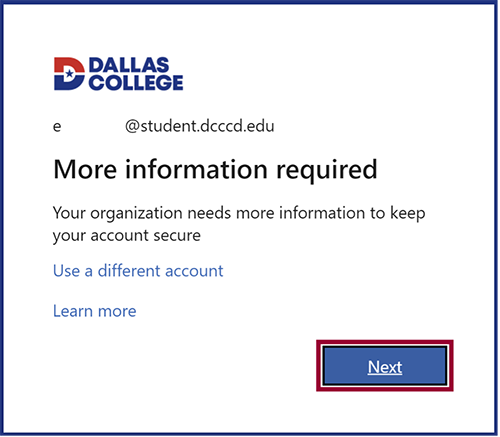
Click “Next.”
Step 3:
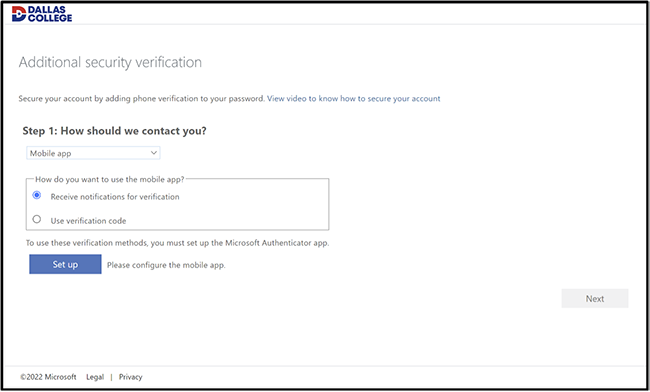
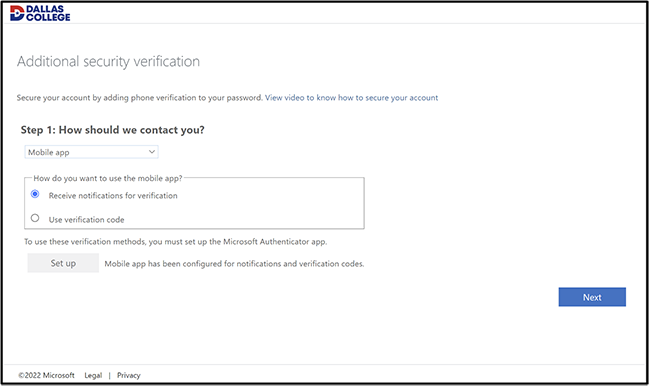
The following page will populate. Under: “Step 1: How should we contact you?” Select “Mobile App.”
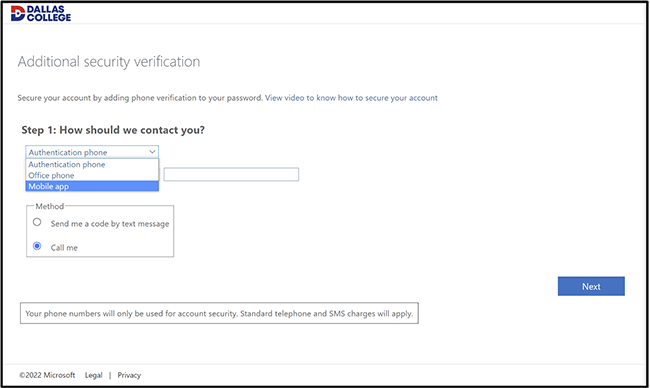
Once “Mobile App,” is selected there are two options:
- “Receive notifications for Verification,” sends a notification to a device.
- “Use verification code,” allows verification without having a cellular/ internet connection.
Step 4:
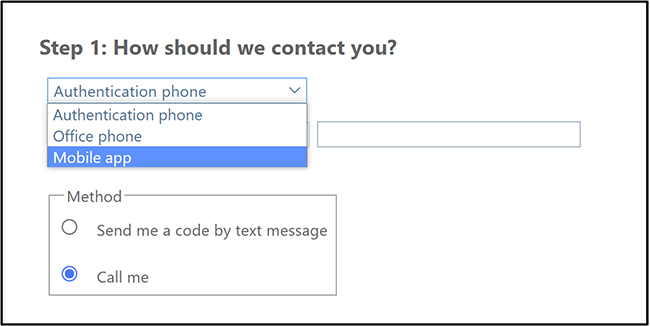
Select a preference for how to use the mobile app.
Step 5:
Click on the: “Set Up,” button.
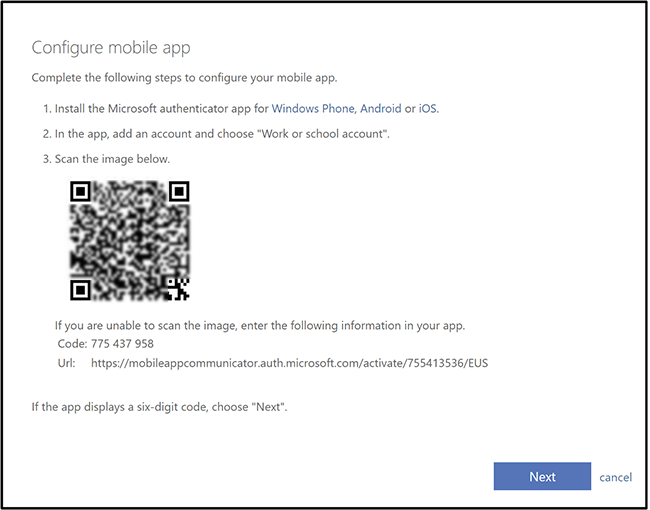
Once you select "Set Up," a QR code will appear on your computer screen. This will be used in Step 10 below.
Note: Each QR code is unique to the user so be sure to use the QR code displayed on your computer screen. The image below is only a sample QR code.
Step 6:
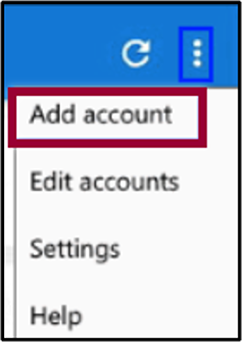
Open the Microsoft Authenticator app on the device.
![]()
Step 7:
Click on 3 dots in top right corner and then select “Add Account.”
Step 8:
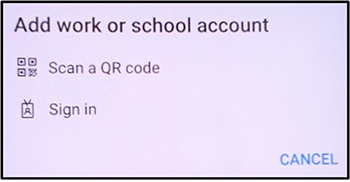
Click on “Work or school account.”
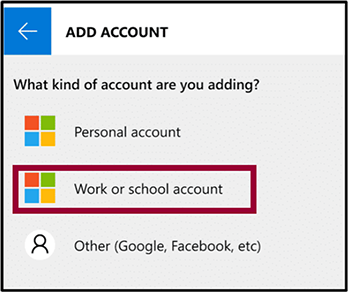
Step 9:
Click on “Work or school account.”
Note: If the designated device does not have a camera use the sign in option.
Step 10:
Using the Camera on designated mobile device, hold up to the screen to capture the QR code that was displayed on your computer in Step 5 and wait for confirmation that the scan is complete.
Note: The mobile device identified in “don’t lose access to your account”.
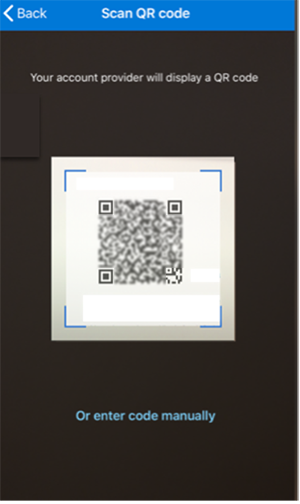
When the QR code is a success, the following message with follow: “Mobile app has been configured for notifications and verification codes.”
Step 11:
Click: “Next,” in the bottom right corner of the view.
Note: The following screen will populate, look at your device to verify.
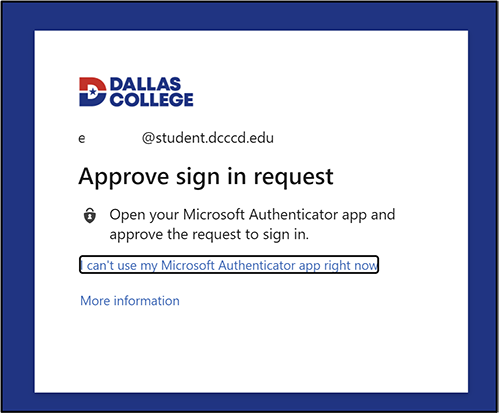
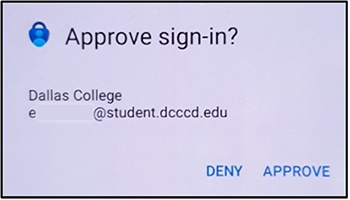
Step 12:
Click on: “Approve,” on designated device.
Access to the Dallas College Office 365 resources is now available.
Get Help
If you run into any issues with setting up the multi-factor authentication feature, please:
Frequently Asked Questions
Call Technical Support
- Available 24/7
- 972-669-6402
- Dual Credit Students: 972-669-6555
Email the Service Desk
- Mon-Sun: 7 a.m. - Midnight
- Email the Service Desk